


You might have come across Shopify when learning about creating an online store. Or maybe you have heard Shopify mentioned as one of the e-commerce stores either by your friends or on YouTube videos. We would share with you what Shopify is, the pros and cons, how it works and much more.
What is Shopify?

Shopify is a subscription-based e-commerce platform that allows anyone to set up an online store and sell their products. With Shopify, you can build both your online store and offline store (physical store). Shopify allows you to sell in physical locations by using Shopify POS, point-of-sale app and accompanying hardware.
As WordPress is to website designers, Shopify offers a platform for store owners to launch their dream business and start selling to customers. Shopify is built with versatility and has features for beginner to e-commerce experts.
What does Shopify do?
Shopify provides you with the tools you need to manage every activity of your e-commerce business. It gives you an avenue to venture into the online selling space. Shopify gives you access to an admin panel that allows you to enter your store data, add products and process orders. The software allows you to showcase your products, engage with customers, accept payments, and many more.
How does Shopify work?
Just like traditional stores, Shopify allows you to design and set up your store before you get it running. Once you sign up, you need to design or modify your Shopify store. You add your products to the store, design the store and ensure it is ready for public view. Once this is done, you need to promote your products.
If a customer visits your online store, you can view from the admin page if the customer is purchasing the product or adding it to cart. Shopify would process the payment when a customer purchases a product and you will get paid. You can then process the order to make sure the customer receives the product
Shopify works in 9 easy steps.
- Sign up and start your free trial
- Add products and product description
- Customize your store theme
- Add a domain for your store so that customers can easily find you online
- Enable payments gateways
- Add shipping methods, cost, and all needed to get the product to the customer safely.
- Integrate Shopify apps to add extra functionality to your store
- Pick the right subscription plan for your store
- Publish your store and start gaining customers.
With Shopify tools, you can understand your customers and better serve them. Customers can opt-in to your email list which allows you to remarket to them.
How to set up a Shopify store
As a business owner, you need to showcase your products, interact with customers, get paid, ship a product as well as manage your daily finances and operation. Getting your store set up on Shopify involves a few processes.
Sign Up
The first step to get started is signing up on Shopify website. Visit Shopify.com to create an account. The homepage has a “Start Free Trial” button. Go ahead and click on one of those buttons to begin. Input the required details to get started and create your store. You would need to submit your email address, choose a password and most importantly a name for your store. The store name you supply must be unique as Shopify won’t allow duplicate store names. One of the best things about Shopify’s free trial is that it is completely free.

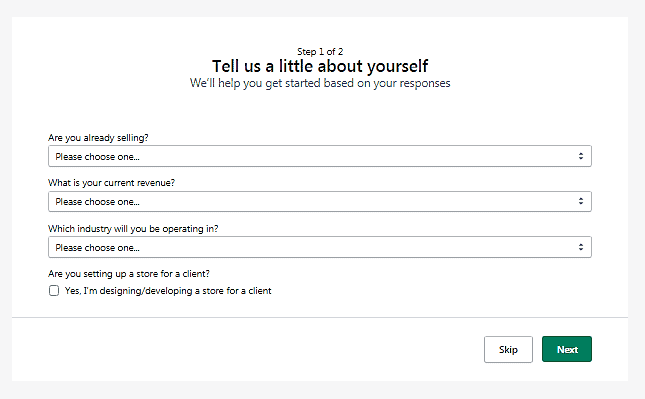
Once you have inputted your details, click on “Create your store” to proceed to the next stage. You would need to provide a few more details about yourself. These include whether you are already selling, your current revenue, the industry you would be operating in. For each option, there is a dropdown menu where you can choose from. Once you are done, click “Next” to continue to the next step.
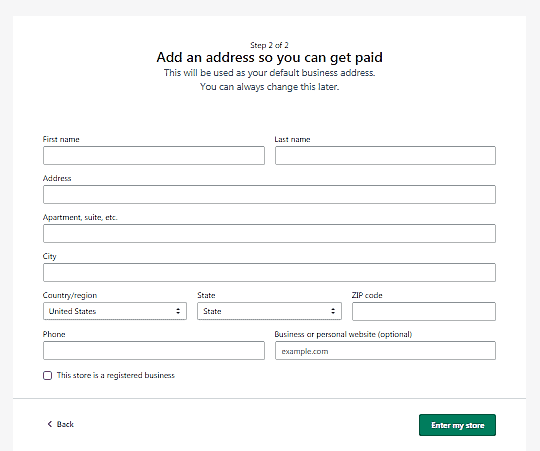
The next thing to do is to add your business address. This will help in processing your payments down the line. The address you input will be used as the default business address. Don’t panic if you don’t have a permanent business address yet. You can change it later. Once you are done, click on “Enter my store” button and get ready to put your store in the right shape.
Add Products
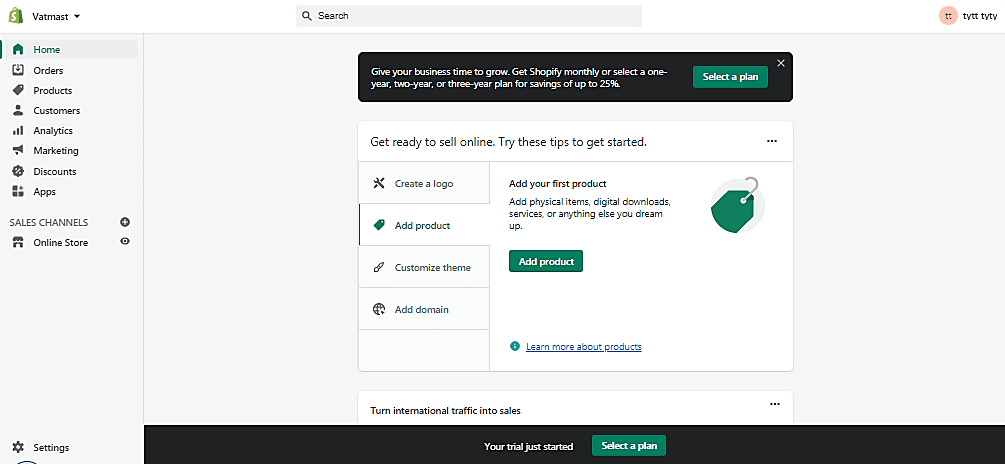
After you fill in your details, you would be directed to your store admin dashboard. This serves as the command room for your store. You will make all decisions about running your store on the admin dashboard.
On the admin dashboard, you will find a navigation menu with a handy setup box. This menu contains four main tasks that you need to complete your store setup and get it running.
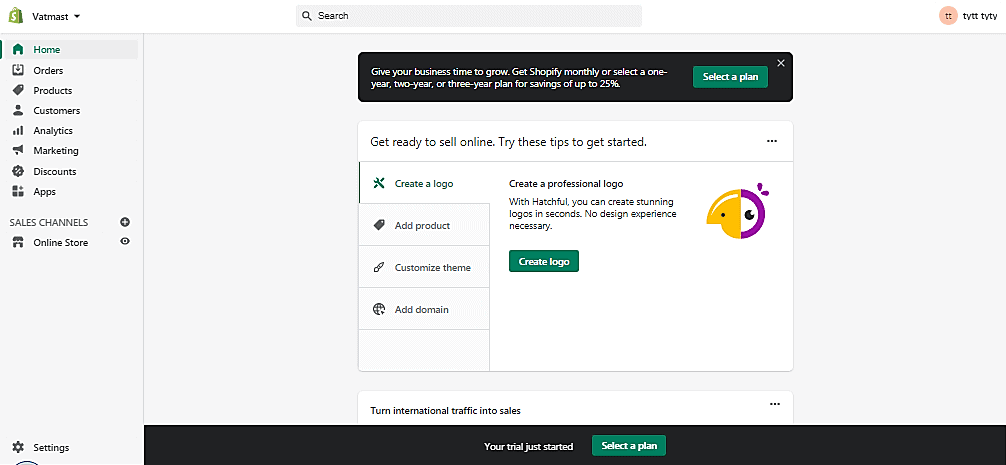
Click on “Add product” to add products to your store and start selling your items. Adding products to your Shopify store is easy. Once you click on the “add product” button, you would be taken to a page where you would input the product details.
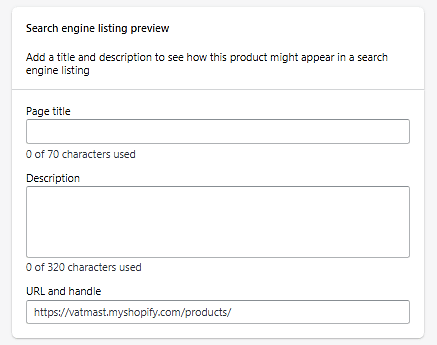
Here you would name the product title, give a detailed product description, upload a quality image of the product and also input other product details.

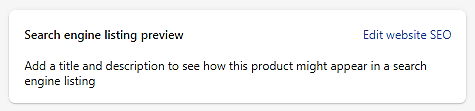
Before clicking the save button, the final thing to check is the search engine preview. This shows how the product will appear on a search engine page. To change the preview, click on Edit Website SEO. This will bring out a series of boxes where you can make necessary adjustments.
Customize Theme
The next stage is picking a theme for your store. Shopify offers free and premium themes. When customizing your store, you can pick from three options. You can stick with the Debut theme; select from the free themes or pick from the premium/paid themes. The premium themes range in price from $140 to $320. The premium themes tend to come with extra functionality and exclusive designs despite being pricey.
If you are not certain if the premium theme is what you need, you can go ahead with the free themes. Shopify free themes still have all the features that you need to get your store running.
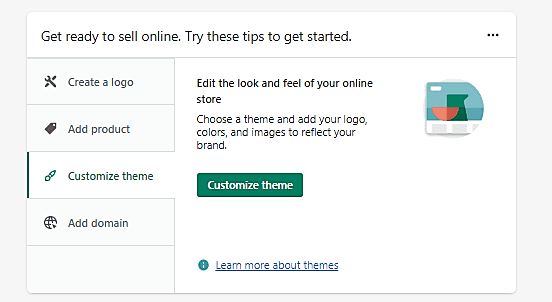
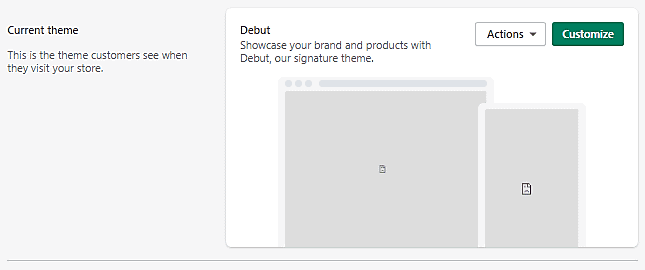
To customize your store, click “Customize theme” from the homepage. It will direct you to the theme management page. You can see the current theme you are running. Next to the theme template is an action button and customize button. The “action” button allows you to preview, rename and duplicate your theme. You can also edit the code and language of your site from the action button.
Once you click on the “Customize” button, you will be taken to the template editor. The editor is divided into two columns. The left-hand side is made up of each element of the page. The elements are broken down into editable sections. The right-side gives a preview of what your changes would look like.
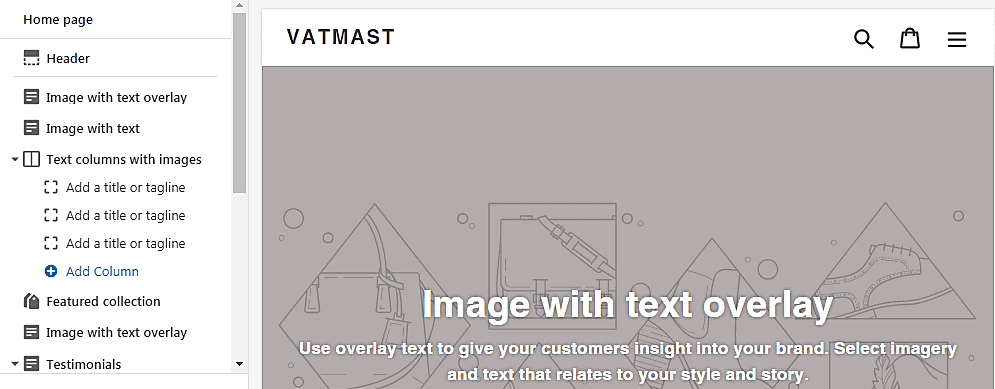
The sidebar allows you to modify the theme. You can edit texts and upload images with the click of a button. You can also make changes to the overall page layout. Scroll down the sidebar to access more tools to modify your store.
Add a Domain
Your store should be ready to launch after you add your products and customize your theme. However, before your website can go live, it needs a name that makes customers find you easily. Your domain name is the first thing your customers will see so it is crucial you find the right URL for your online store.
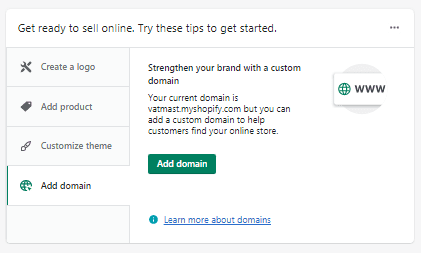
Once you create your Shopify store, it will come with a free “.myshopify.com” Shopify subdomain. Although the free domain would help keep costs low, it doesn’t look professional. You can spice things up and buy a new domain or connect an existing domain.
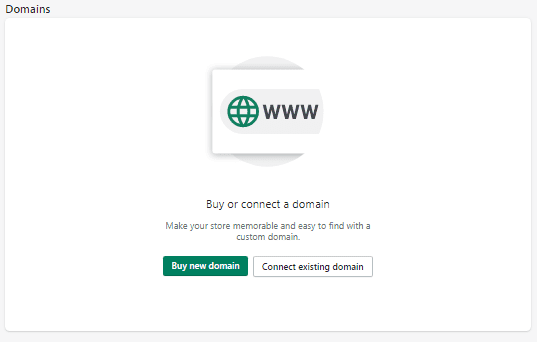
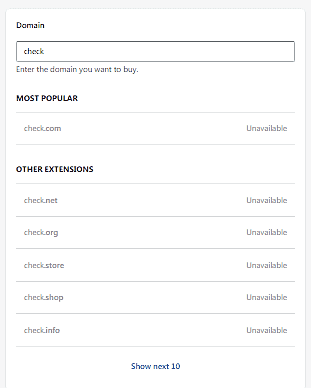
To purchase a new domain, click the “Buy new domain” button. Shopify has a search bar to check if your domain choice is available. It also suggests other extensions like “.net, .shop, or .store”. The cost of a new domain may cost from $14 per year.
If you have a domain you want to connect, click on the “Connect the existing domain” button. You would be redirected to input the domain you want to connect. On the next page, click the “Connect automatically” button. Log in to your domain provider and click the “Connect” button to complete the process.
Enable Payment Gateway
Now your store is fully stocked and designed to better serve your customers. It is time to make some money. You need to set the payment gateway for your store. Shopify provides its own payment gateway known as “Shopify Payments”. There are alternative payment gateways that you can use if you choose not to use Shopify Payment. These include PayPal and Amazon amongst others. It is important you know that you will be required to pay transactional fees when using alternative payment gateways.
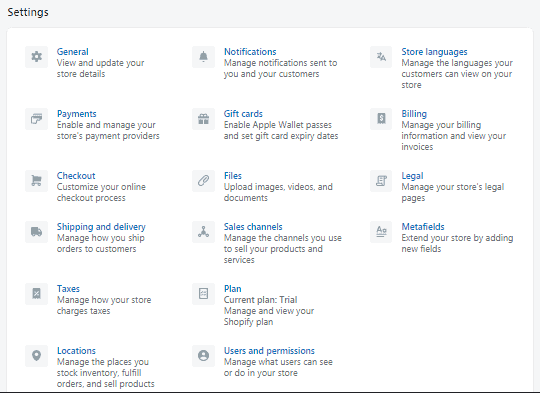
Click on the “Settings” button from your Shopify dashboard. Then click on the “Payment” icon among the list. From here, you have access to all the required steps to set up your store payment gateway.
Add Shipping
You can easily customize your shipping process. You can add shipping zones, buy shipping labels and also decide on the amount to charge your customers. When setting up the shipping process, there are different ways to calculate your shipping cost.
- Priced-based shipping: shipping rates are determined by the price of the overall basket.
- Flat shipping rates: Shipping rates that don’t change but apply to specific transactions irrespective of the weight, shape or size of the product the customer is buying.
- Weight-based rates: shipping rates are determined by the weight of the overall basket.
- Calculated shipping rates: Shipping rates are calculated by the shipping carrier. Details are sent to the external providers at checkout. External providers calculate the shipping and send back the cost.
Integrate Apps
Shopify is made up of amazing apps that can make your store run more smoothly and look nicer. The apps help you to manage and scale your business. Some of the apps are available for free while some are paid.
Click the “Apps” button from the navigation button to select and integrate Shopify apps to your store.
Choose a Price Plan
Before you can publish your store, you need to subscribe to a plan. You need to select a plan for you to keep using the platform after the 14-day free trial. You can upgrade to a plan during the free trial period by clicking on the “Select a plan” button at the foot of every page.
Shopify price plans range from Basic to Advanced. The price of each plan are as follows:
- Basic Shopify – $29 per month
- Shopify – $79 per month
- Advanced Shopify – $299 per month
Each Shopify plan comes with its features. The Basic Shopify plan is good for new or small stores. It comes with features that you need to set up your new store. The Shopify plan is best for growing businesses while the Advanced Shopify plan is best for scaling very large stores.
Publish your Store
You can only publish your store once you have chosen a paid plan. Customers can’t view your store during the free trial period because of the password restriction. To make your store go live, you need to upgrade to a paid plan. Once you have upgraded to a paid plan, visit your Shopify admin page. Click the “Online store” button and then “Preferences”. Scroll down to the section labelled “Password Protection” and uncheck the “Enable password” option. Once this is done, customers won’t have to enter a password to access your Shopify store.
How to cancel Shopify
<iframe width=”560″ height=”315″ src=”https://www.youtube.com/embed/mTe8Ifk2Nos” title=”YouTube video player” frameborder=”0″ allow=”accelerometer; autoplay; clipboard-write; encrypted-media; gyroscope; picture-in-picture” allowfullscreen></iframe>
If you are a Shopify store owner and your store is eligible, then you can use your Shopify admin to pause your store temporarily or permanently close your store.
You can pause your store in the following ways:
- Pause your store and continue to work on it
- Pause your store completely and step away
However, to be able to pause your store, your store needs to be on a paid plan and at least 60 days past the free trial period. You can’t pause your store if your store doesn’t meet these criteria.
You can also close your Shopify store in the following ways:
- Cancel your subscription and close your Shopify store
- Sell your store on the Exchange Marketplace.
Pause and Build Plan
The Pause and Build Plan allows you to pause your store and continue to work on your store. The plan allows you to access your Shopify admin to optimize your store and edit your products at a reduced subscription fee. However, your Shopify store checkout is disabled.
During the Pause and Build period, customers can visit your store and browse your products but they can’t purchase your products. You can only access the Pause and Build plan if your store has been on a paid plan for at least 60 days after the end of your trial period.
Pause Plan
The Shopify Pause Plan allows you to pause your store for three months with no subscription fee payment. During this period, you can’t access your Shopify admin or work on your store. Customers that visit your store would be notified that your store is temporarily closed. You can however collect visitor email addresses to let them know when you reopen your store.
You can reopen your store by logging in to your store during the three months. If you decide not to reopen your store within the three months, your store would be upgraded to the Pause and Build plan.
To pause your Shopify store, the steps required are:
- Log in to your store and go to your Shopify admin
- Click “Settings” then “Plan”
- Click “Pause or cancel subscription” then select the “Pause for 90 days” or “Pause and build” plan
- Review the plan details and then click “Pause store” or “Switch to Pause and build” based on the plan you selected.
Cancel your subscription and close your Shopify store
You can close your Shopify store anytime you don’t want to run it anymore. You won’t have access to your Shopify admin after you close your store. If you want to get back to your store, then you need to enter your credit card details and reactivate your store. If you close your store, you can’t create a new store with the same store name as the closed one.
Before you can close your store, make sure;
- You have pay any outstanding charges
- Save your store details by exporting CSV files
- Cancel all third party app subscriptions outside Shopify
- If you have a custom domain that you bought through Shopify, then you can transfer or to another provider
- If you have a custom domain that you bought through a third-party, then you can remove it from your store using your Shopify admin. If you don’t remove your domain from your Shopify store before closing it, then you might not be able to use it for another website.
- Make sure to turn off auto-renewal for your custom domain on your registrar’s website to avoid unexpected charges.
To cancel your subscription and close your store;
- Click the “Settings” button from your Shopify admin. Then click on “Plan”
- Click “Cancel subscription” or “Pause or cancel subscription”
- Review the options to pause your subscription or sell your store
- Click “Cancel subscription and close store” to cancel your store
- Select a reason for cancellation and then click “Continue”
- Enter your password and then click “Close Store”
Sell your Shopify store on Exchange Marketplace
If you are interested in selling your business and no longer want to run your Shopify store, you can sell your Shopify store. Listing your store on the Shopify Exchange Marketplace is a convenient place to sell it online.
What is Shopify Dropshipping?
Shopify dropshipping allows you to sell products by using a supplier that holds the inventory and ships the product for you. With Shopify dropshipping, you pay the supplier the wholesale price while you control the price your customers see in your Shopify store.
Products you choose to sell will shape how you run your online store, how you market and who you market to. You don’t have to hold any inventory when using Shopify dropshipping. When customers place an order in your store, you purchase the products from the supplier and select how to ship the product to the customer.